Do you mean connect the tutorials, or connect the actual sections in the piece? The different sections are definitely meant to be connected to each other in the song.
In the story I tell at the end of the lesson, there’s a picture of when I got married. The Salt Lake Temple is the building in the background of that picture. And LDS is a religion–the acronym is short for “The Church of Jesus Christ of Latter-day Saints”.
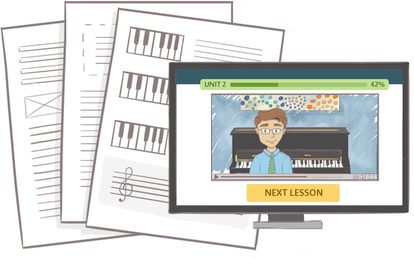
Hello and welcome. I'm Joseph Hoffman and today we're going to work on learning section C of Beethoven's "Fur Elise." Just to be clear, we are learning Beethoven's full original version of "Fur Elise," which as far as difficulty goes, is a level 6, which is for intermediate pianists. Also, if you haven't learned the A or B sections yet you might want to check out those tutorials first. Okay let's get started with learning the section C of Beethoven's "Fur Elise." So let's check out the first chord in the right hand of the C section. You'll see this complex looking four note chord, but let's just break it down one note at a time starting with the bottom note you see we've got an E, and then a G, and then another skip up you can see we've got a B but that flat is in line with that B, and then we've got a C in line with this sharp. So a C-sharp. So E G B-flat C-sharp, played with fingers 1 2 3 5. Why don't you try that chord out on your piano. Isn't that a juicy sweet chord. That's called a fully diminished vii chord. It's a diminished chord with another minor third on top. It creates this really intense sound. Beethoven likes to use fully diminished vii chords to create some angst, some feeling of emotion there. Okay, so we've got that chord which lasts for 3 beats. 1 2 3 That resolves to a D minor first inversion chord. F A, finger two and finger 5 on D. Go ahead and try that out. Good, now let's practice going between those. We've got the fully diminished chord. 1 2 3 5, going to the D minor first inversion chord. Good, now press pause and just work on going between those two chords uh several tries, then press play to go on. Good, now after that D minor chord we hold that for 2 beats, 1 2, and then 3-& come up here with fingers 2 and 4 on C-sharp and E. Two sixteenth notes 3-&. Now you try. One more time: 3-&, Now you try. Good, then after that we add in this G-sharp, you've gotta kind of shift your hand forward so your thumb can reach. What I don't want to see is you awkwardly twisting your hand to the side like that. To reach with the thumb you glide forward on the keys like this, and then G-sharp D F with fingers 1, 3, 5. Try that chord. 1 2 3 And that re-chord resolves to an A minor chord, which I suggest doing with fingers 1, 2, 4, and here's why. Since you've got 3 and 5 on that chord it's a very nice way to resolve the chord using 1, 2, and 4. 1 2 3, 1 2 3 Now press pause and work on this section. 1 2 3, 1 2 3, actually go all the way back to 1 2 3, 1 2 3 Press pause to work on that little section then press play to go on. Now let's put those four measures together. So we've got this fully diminished chord, 1 2 3, to D minor, 1 2 3-&, 1 2 3, 1 2 3. Okay, now it's your turn to press pause. I'd like you to count out loud while you play this. Otherwise it's easy to lose track of the beat, and the rhythm in this section is so important. So, counting while you play work on those four measures on your own, then press play to go on. Good, now next up we've got this section with the interval of a sixth being kind of the driving factor here. We've got this F and then up a sixth to D, 2 beats, 1 2 3-& 1 2. Now when you're moving down in six make sure you keep your wrist relaxed. In fact, take your left hand and just kind of hold your forearm and just kind of flop your wrist for a little bit. Like that, okay. That's kind of how you want to feel when you're moving down these sixths. Think of a really flexible wrist there kind of like you're dribbling a basketball. 1 2 3-& 1 2. Now if your hand is big enough to comfortably play this last chord with 1 2 4, that’s what I recommend on that C F-sharp, A, which is an F-sharp diminished chord and second inversion if you care. Right, and you should care right so we're coming So we're coming down in 6. 1 2 3-& 1 2 Now press pause and work on that section. So you might want to really slow it down. 1 2 3-& 1 2 Okay, and be sure you land on that chord properly. Press pause and give that section some work, and then press play to go on. Now, so we've ended up on this F-sharp diminished second inversion chord, and then on beat 3 we play just the C and the A in that open sixth. We repeat and I'm continuing to use my finger 1 and 4 because those were the fingers that ended up there. So 1 4 1 4, then we jump up a third. So i switch to 1 5, and then we have these descending sixths. So you could just use 1 5 1 5 1 5 for your fingering as those sixths come down, but a more advanced fingering would create a more legato tone like this. You do 1 5 1 4 1 3, and to make it really legato what you do is you lift your thumb to move down, but you keep your finger 5 holding until the last possible moment you lift your thumb, hold that finger down and you see that way you can create a purely legato tone, listen. See, even when I lift my thumb, I don't lift that top finger until I play the next note. That's a really advanced fingering technique to make a very legato sound. 5 1, 4 1, and then 3 1. Now, if that's too big of a stretch for your hands you can do 5 1, 5 1, and then 4 1. Or if even that's too much of a stretch 5 1, 5 1, 5 1 is okay as well. So, try those out. Start with this one and just see how ...
Für Elise (Beethoven)
What You’ll Learn
Learn how to play the world's most beloved classical piece for solo piano, Für Elise by Ludwig van Beethoven.
Get the sheet music: https://www.hoffmanacademy.com/blog/fur-elise
+9,999
Activity successfully completed!
Upgrade to Premium
Access all our premium features when you upgrade. Premium features include all the
downloadable materials (printable pages and audio tracks) and access to all games and
practice sessions.

Mr.Hoffman you posted part 6 on my birthday!!!!!
Really? Happy Birthday! 🙂
Can you connect the B section with the C section
Do you mean connect the tutorials, or connect the actual sections in the piece? The different sections are definitely meant to be connected to each other in the song.
Whoa! You’re LDS??!! I am too!! Was that the Salt Lake Temple?!
Yes, I am LDS and that was the Salt Lake Temple. 🙂
What’s the salt lake temple and LDS?
In the story I tell at the end of the lesson, there’s a picture of when I got married. The Salt Lake Temple is the building in the background of that picture. And LDS is a religion–the acronym is short for “The Church of Jesus Christ of Latter-day Saints”.
Salt Lake Temple pretty awesome I’m LDS too
Well I could play the left hand and right hand separate but just not together.
It can definitely be pretty tricky to play the b section with hands together. I’m confident that you can master it with practice, though. 🙂
HI MR hohman academy!
Hoffman academy
Hi! 🙂
The part 5 b section one was too hard but I could play the c section.